Create an Alert
You can create alerts either from within the announcement or discussion item itself by using the Scholantis Bell icon, or via the Site contents page.
Using the Scholantis Bell Icon
The Scholantis bell icon is available in discussions, announcements, and special announcements. It is the easiest way to create an alert.
To set up an alert:
- Click the announcement or discussion to view it. It will either display on its own page, like the image below, or in a pop-up window.
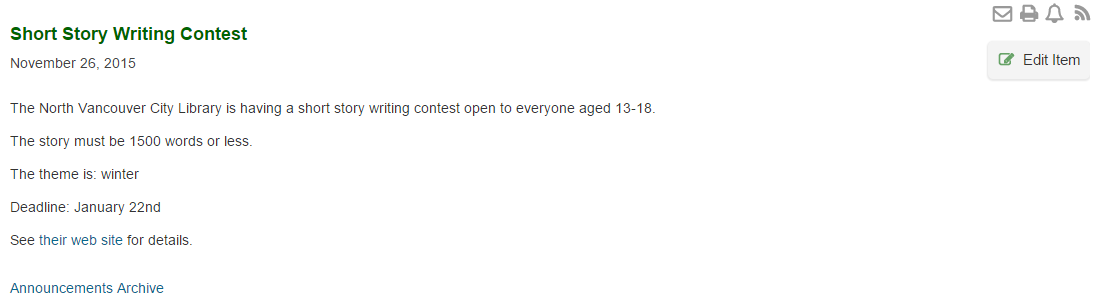
- Click the bell icon to the right of the announcement to add the new alert. The New Alert page displays:

If you are adding an alert to a Special Announcement, you will access this page through a pop-up. See Add an Alert to a Special Announcement for details.
- Edit the fields as follows:
| Field | Action |
|---|---|
| Alert Title | This is the title of the alert. By default, this will be the same as the title of the special announcement. |
| Send Alerts To | Choose who will receive the alert. By default, your account will be included. |
| Delivery Method | From the radio buttons, choose whether you'd like to receive the alert by email or text message. If you choose text message, be sure to include your cell number in the field provided. |
| Send URL in Text Message | Select this checkbox if you chose Text Message in the Delivery method field and would like the URL for the special announcement sent to you. |
| Change Type |
Here, you can select the type of changes to the special announcement you'd like to be alerted to. |
| Send Alerts for These Changes | Here, you can specify exactly which changes you'd like to be alerted to, such as any changes, or if someone simply changes an item last edited by you. |
| When to Send Alerts | Here you can choose when the alerts are sent: immediately, a daily summary, or a weekly summary. If you choose weekly summary, choose the day of the week and time that you'd like the summary sent. |
- When you are done, click the OK button to save your changes.
Via the Site Contents Page
You can use this to create an alert on any page that you have access to the Site Settings menu. This is usually found on sites that you have created or own. For teachers, it would be on a class or gorup site.
Setting up an alert on a Shared Documents page for your classes is a great way to track student activity.
To set up an alert:
- From within the page or site you wish to set up an alert for, click the Settings Menu:

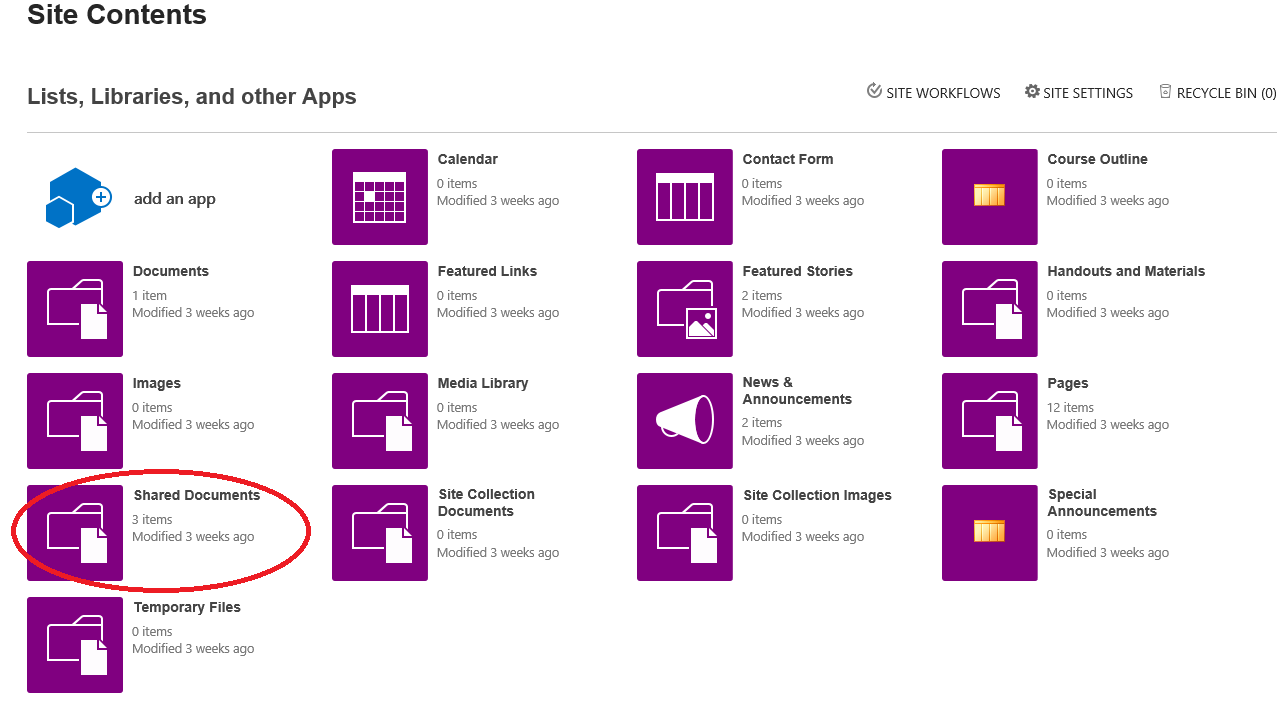
- Click Site contents to access the Site Contents page. Here, you will find a full list of Apps available on the site.
- Find and click on the Shared Documents app.
- On the Shared Documents page, select the checkbox beside a file.
- Click the LIBRARY tab on the top left:

- On the LIBRARY tab, click the Alert Me button and then click Set alert on this library.


- The New Alert pop-up displays.

- Edit the fields as follows:
| Field | Action |
|---|---|
| Alert Title | This is the title of the alert. By default, this will be the same as the title of the special announcement. |
| Send Alerts To | Choose who will receive the alert. By default, your account will be included. |
| Delivery Method | From the radio buttons, choose whether you'd like to receive the alert by email or text message. If you choose text message, be sure to include your cell number in the field provided. |
| Send URL in Text Message | Select this checkbox if you chose Text Message in the Delivery method field and would like the URL for the special announcement sent to you. |
| Change Type |
Here, you can select the type of changes to the special announcement you'd like to be alerted to. |
| Send Alerts for These Changes | Here, you can specify exactly which changes you'd like to be alerted to, such as any changes, or if someone simply changes an item last edited by you. |
| When to Send Alerts | Here you can choose when the alerts are sent: immediately, a daily summary, or a weekly summary. If you choose weekly summary, choose the day of the week and time that you'd like the summary sent. |
- When you are done, click the OK button to save your changes.