Edit Content
Edit Page Content
The Edit Content easy button appears on the right side of the page and can be found on every page you can edit the content for.

To edit the content on a page:
- Click the Edit Content easy button. A dialog with formatting options will open.
- Create, type, and design your content using the formatting tools.
- Click the Publish button to save and publish your work.
Styles, markup, and other content, such as videos, pictures and links, are outlined below.
Formatting Ribbon Tab
The FORMAT TEXT ribbon tab provides familiar formatting features.
- Change the font, color, bold or italicize text, indent paragraphs, add bullets or numbering.
- Add styles, modify markup, and and other content, such as videos, pictures and links.

Paste Content from Websites or Documents
To transfer a paragraph or a page of content from another website or document:
- Copy the source content to your clipboard.
- Click Edit Content on the destination page.
- Paste your content using your mouse's right-click functionality, or by clicking the Clipboard drop-down arrow and then clicking Paste.
Tip
If the Paste button is not activated, check your browser. Paste using the Clipboard menu does not work using Chrome or Firefox, because those browsers are blocking javascript for security reasons. You can still paste using your mouse's right-click menu. To activate the Clipboard menu's full feature, use Microsoft Internet Explorer.
- To remove the source formatting select the pasted content and click the Clear Format button (pink eraser) in the Font menu. This removes existing formatting and HTML so you can apply new styles which will match your site's style and formatting.

- Click Publish to save and publish your work.
Tip
Some HTML and text formatting cannot be removed using the Clear Format feature. To ensure all formatting is removed we recommend first copying and pasting content into a text editor such as Notepad (for Windows) or Text Editor (for Mac). Then re-copy the plain text to your clipboard. This will remove all underlying formatting and any poorly formed HTML.
Styles
The Styles menu provides preset heading and text styles to ensure a uniform, consistent look across your site.

Markup
The Markup menu and Edit Source button allow you to view and edit the underlying HTML of your web content.

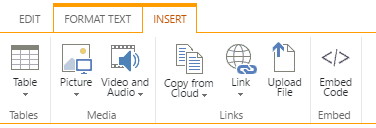
Insert Ribbon Tab
Click the INSERT tab to add tables, pictures, links and other content.
Picture
To insert a picture:
- From the INSERT tab, click the arrow on the Picture button.
- Select the source of your image:
- From Computer (upload a file from your computer)
- From Address (display a file stored on another website)
- From Sharepoint (to insert a picture already stored on your site)
- Choose the file you'd like to upload, or enter the address of the picture.
- Once the image is uploaded, it will automatically be highlighted, and the IMAGE ribbon tab is available. Use it to adjust the picture size and other settings.
- Use the Image Styles button to add a border around the image.
- Use the Position button to choose where you would like to position the new image: Float, Left, Right, Top, Middle, or Bottom.
- Click Publish to save your work.
Video and Audio
See the Insert Video guide.
Copy from Cloud
In any document library, you can copy over your documents from the cloud, using either Google Drive or Office 365 (if installed). This allows you to insert files or images from Office 365 OneDrive or Google Drive.
To insert a file from Google Drive:
- From the INSERT tab, click the arrow on the Copy from Cloud button.

- Select From Google Drive.
-
In the Choose file from Google Drive pop-up, click the CHOOSE FILE button.
If this is the first time you are accessing Google Drive from Scholantis, you will be prompted to give permission for Scholantis to be able to access your Google Drive. This will appear only once.
-
In the Select a File pop-up, choose a file you would like to add and click the Select button to return to the Choose file from Google Drive pop-up.
- Select the Destination from the drop-down list.
- Click the OK button to insert the file.
To insert a file from Office 365 OneDrive:
- From the INSERT tab, click the arrow on the Copy from Cloud button.
-
Select From Office 365 OneDrive.

-
In the Choose file from Office 365 OneDrive pop-up, click the CHOOSE FILE button.
If this is the first time you are accessing Office 365 OneDrive from Scholantis, you will be prompted to login.
-
In the Select a File pop-up, choose a file you would like to add and click the Select button to return to the Choose file from Office 365 OneDrive pop-up.
- Select the Destination from the drop-down list.
- Click the OK button to insert the file.
Upload File
This uploads a file from your computer.
To insert a file from your computer:
- Click the Upload File button.
- In the Add a document pop-up, click the Choose File button.
- Select the file you'd like to upload and click the Open button.
- Choose a destination form the Destination Library drop-down menu.
- Optionally, you can add any comments you like int the Version Comments field.
- Click the OK button to add the file.
Link
Inserts a hyperlink to a file or any address on the Internet.
To insert a link:
- From the INSERT tab, click the arrow on the Link button.
- Choose From Sharepoint to insert a link from Sharepoint.
OR - Choose From Address to insert a link to a web site.
- For Sharepoint: Select the Sharepoint file to link to and click the Insert button.
OR - To link to a URL: Enter the Text to Display and Address and click the OK button to insert the link.
- Click the Save or Publish button to save your changes.