Information for Teachers
If you have Scholantis SIS Data Sync enabled on your site, you can now invite parents or guardians to the Parent Portal.
Parent Portal allows parents to stay in touch with their child's learning. Once a teacher has invited them, they can view their child's portfolios, comment on portfolio posts, and see what classes their children are in. When a new post is added to their child's portfolio, they will receive notifications so they can stay up to date. Teachers can also send out group emails to all the students' parents or guardians.
Access the Parents Page
The Parents page allows you to invite parents to the Parent Portal and administer parent access to Student Portfolios.
To access the Parents page:
- From within the class site, click the Settings Cog then select Parents from the drop-down menu.
- Or, from Portfolios, click the PARENTS button.
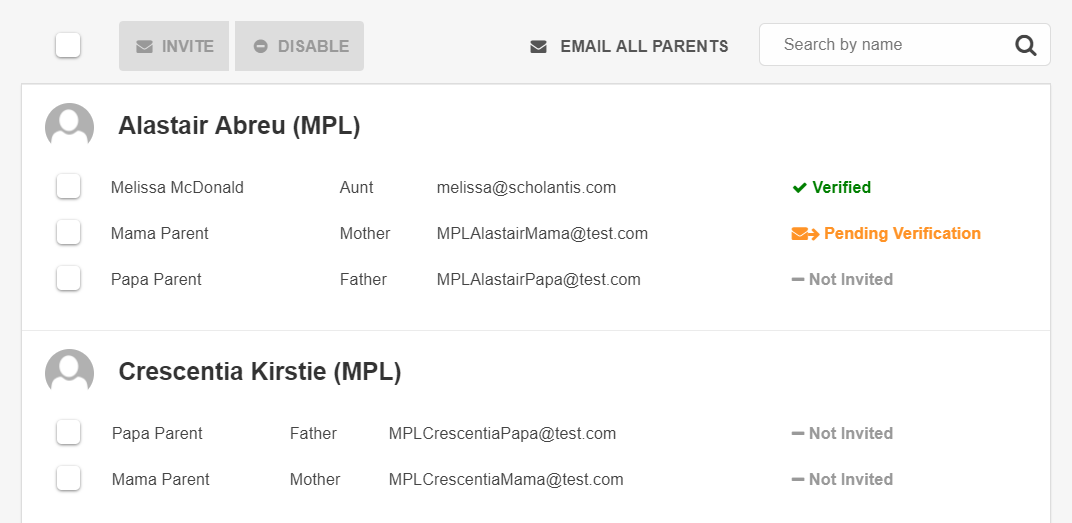
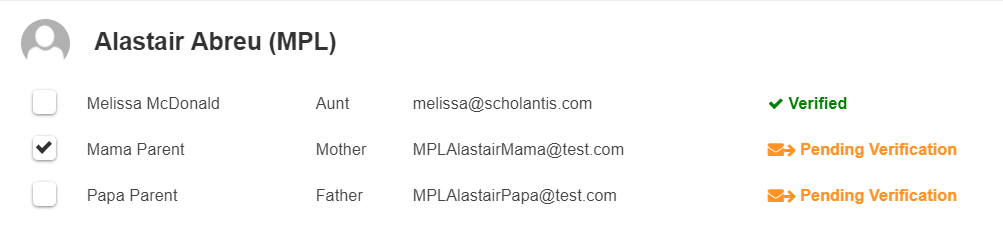
- The Parents page displays a class list of student names with the names of their parents and/or guardians below it.
Invite Multiple Parents to the Parent Portal (Bulk Add)
To invite all parents:
- On the Parents page, click the checkbox beside the INVITE button at the top of the screen to select all the parents.
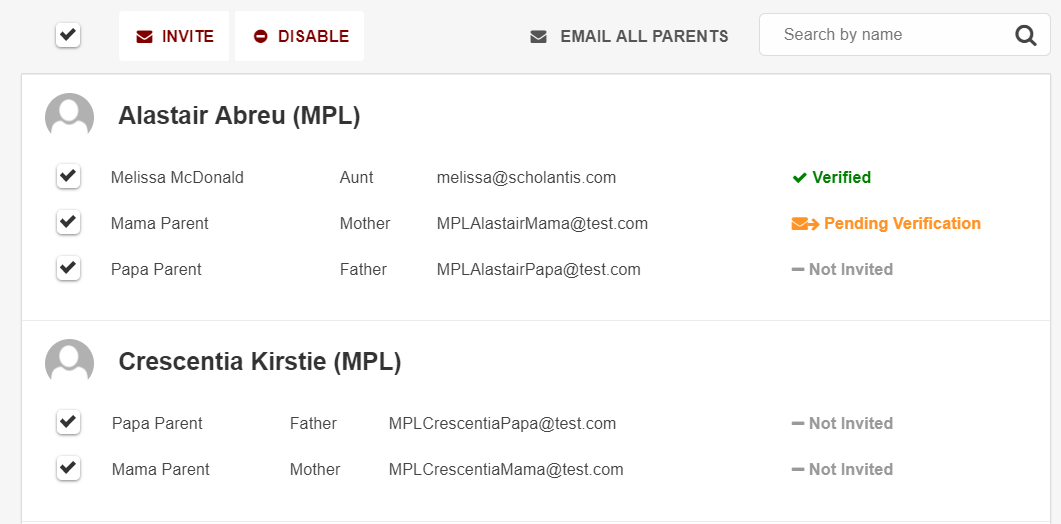

- Click the CONFIRM button to send the invitation.
- The Parent's status changes to Pending Verifification. Once a parents accepts the invitation, their status changes to Verified.
Invite a Single Parent to the Parent Portal
To invite a specific parent:
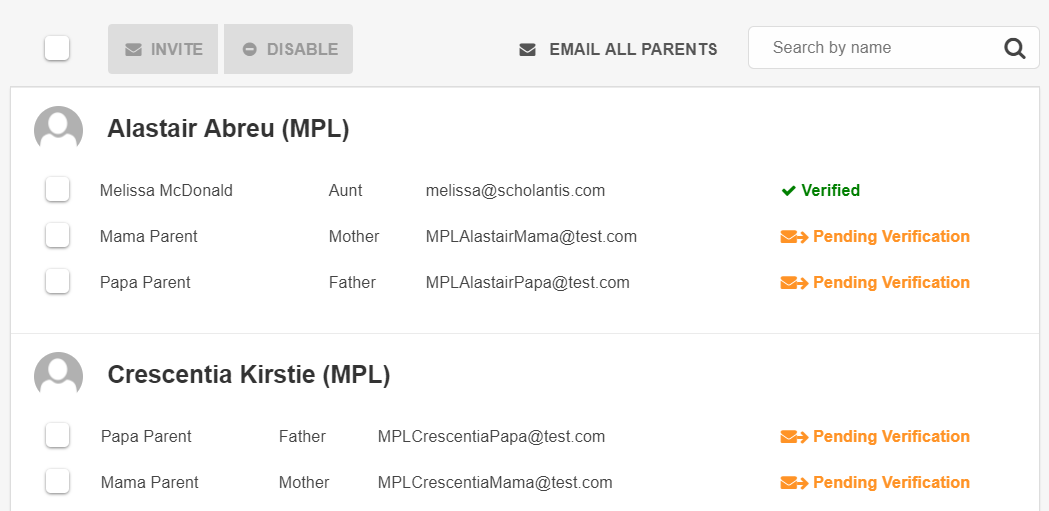
- On the Parents page, click the checkbox beside the parent you would like to add.

- Click the CONFIRM button to send the invitation.
- The Parent's status changes to Pending Verifification. Once a parents accepts the invitation, their status changes to Verified.
How Do Email Invites Work?
Email invitations are sent from a district email address (e.g., [email protected]). The email includes a link to subscribe to portfolio notifications:
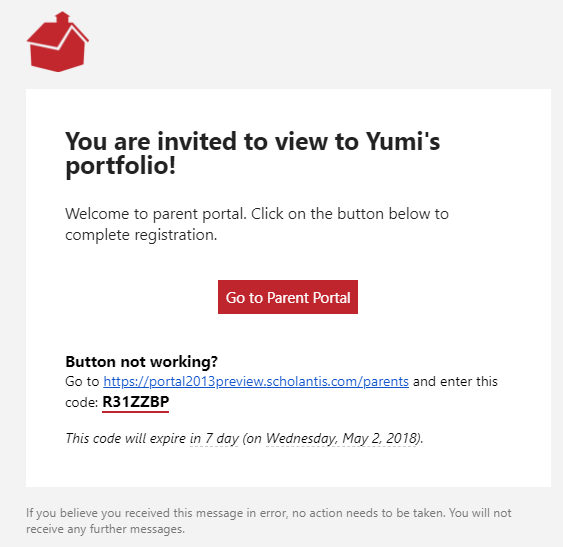
Parents must click the Go to Parent Portal link to activate their subscription and set up an account. For details, see Information for Parents.
Check Subscription Status & Resend Invite Emails
To see the status of a parent invitations:
- That status of a parent's invitation displays right on the page:

To resend an invite email to an inidividual parent:
- See Invite a Single Parent to the Parent Portal above.
Send Parent Emails
To email all parents:
- Click the EMAIL ALL PARENTS button.
- Your email program will launch a new message with all parents email addresses entered in the BCC field to ensure privacy.
- If your mail program does not open, or you use web based email, a dialog will open with a list of parent email addresses.
To invite a specific parent or resend an invite:
- To email the parent or guardian, select the email address and copy by either right-clicking on it and selecting Copy, or using Ctrl + C.
- Open your mail program and paste the email address into the To: field of the message.
- Compose and send the email as usual.
Remove a Parent from the Parent Portal
Should you need to, it is possible to revoke a parent's access from the Parent Portal. You can also revoke a group of parents. The difference is simply how many you select at once. Just like you would select all parents to bulk add them, you would simply select all parents to bulk remove them.
To remove a specific parent from the Parent Portal:
- On the Parents page, click the checkbox beside the parent you would like to disable.
-
Click the DISABLE button. A confirmation pop-up displays:
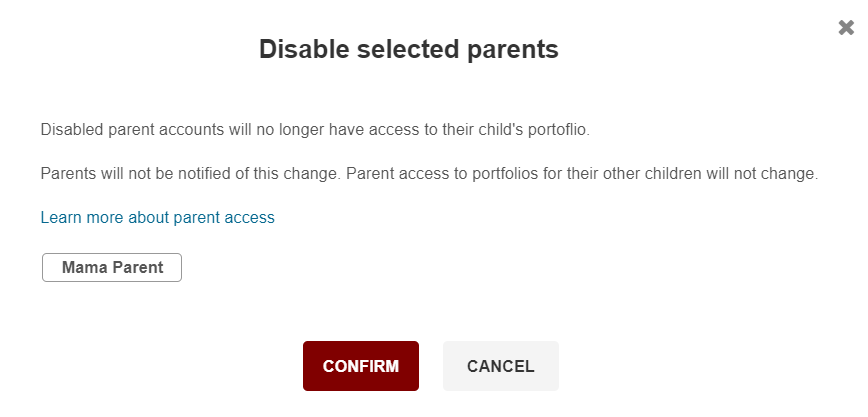
- Click the CONFIRM button to disable the parent account.
- The parent's status returns to Not Invited.

See if a Parent Has Viewed a Post
Once parents have completed their subscription, they will receive email notifications when new Portfolio posts have been added to their child's page.

Teachers can see which parents have viewed their child's portfolio pages from within the Portfolio post itself.
To see who has viewed a portfolio post:
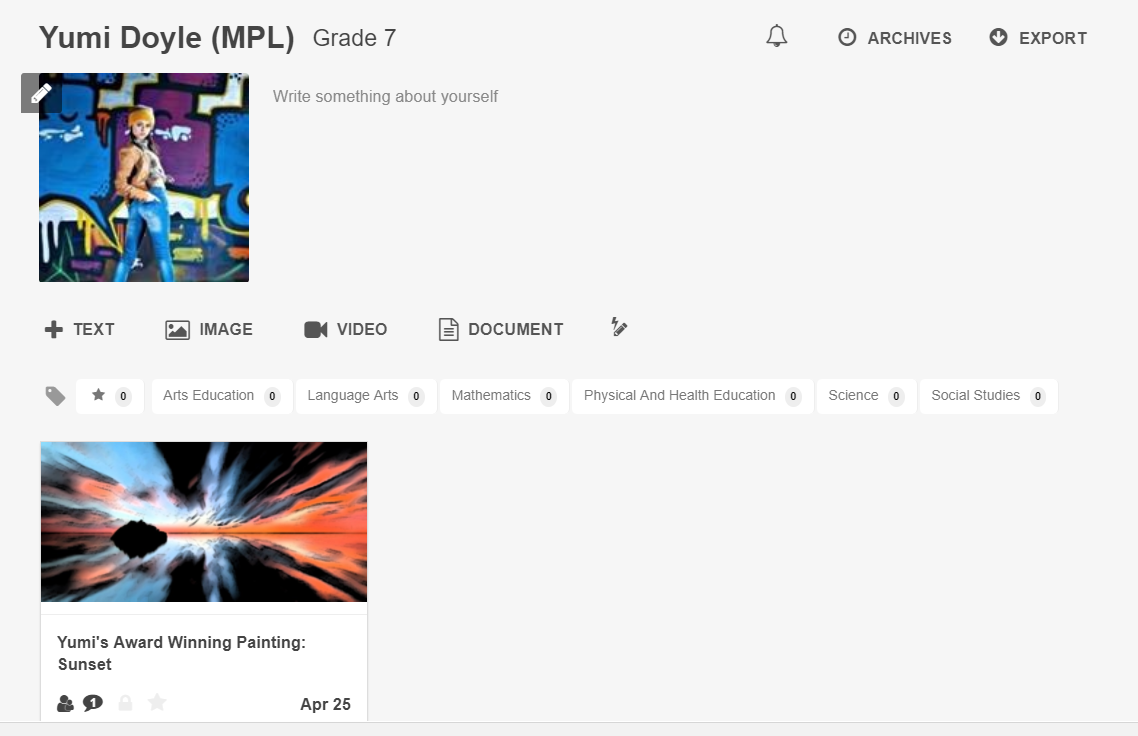
- Navigate to the student's portfolio page and then open the student's post.
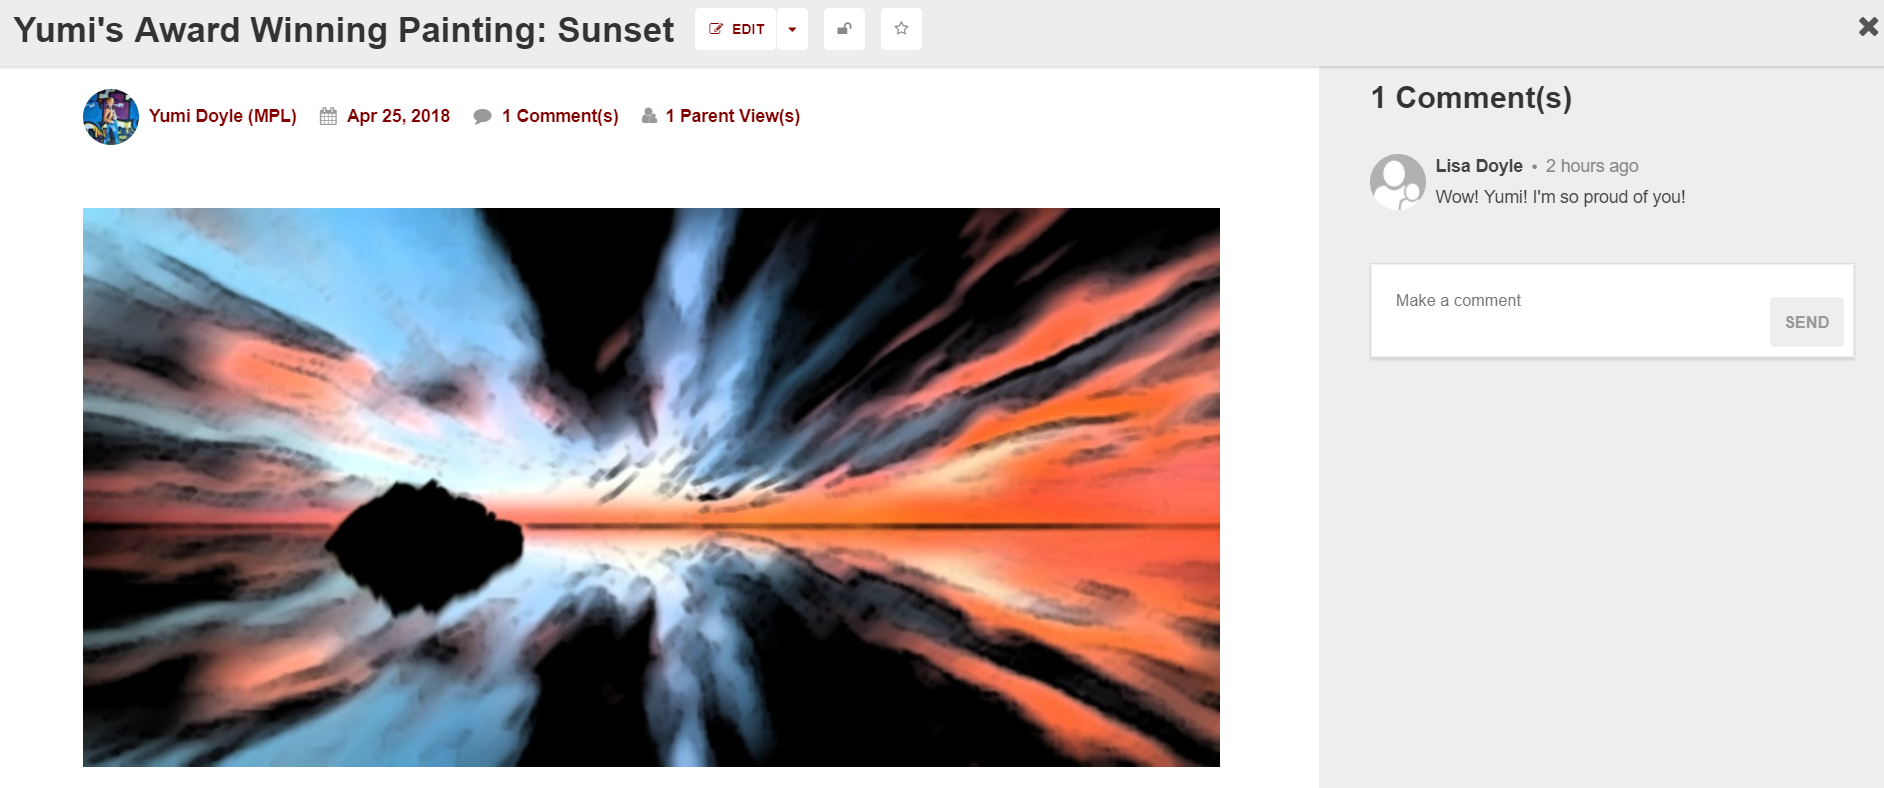
- At the top of the post, the number of comments and parent views displays.
Hover your mouse over the Parent Views link to see the name of the parent who viewed the page and how long ago they viewed it:

See if a Post is Visible to a Parent
To see if a post is visible to a parent, check the Icon at the bottom of the post:

| Icon | Meaning |
|---|---|
|
|
Post is visible to student and teacher only. |
|
|
Post is visible to parents, student, and teacher. |
For more informartion on how to make posts visible only to teachers and students, see Publish to Parents.
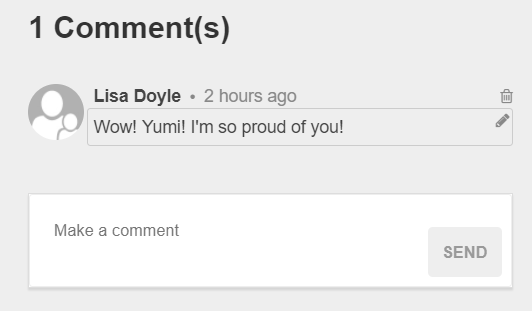
View, Edit or Delete Parent Comments
Teachers can view, edit and delete parent comments on a student portfolio.
To view parent comments:
- Navigate to the student's portfolio page. If there are comments on a post, it will display in a comment icon on the post itself.
- To view the comment, click on the post to open it:

- From here, you can reply to the comment, edit, or delete it.
- When you hover your mouse over the comment a pencil icon and a trash can display:
Edit a Post
- Click the pencil icon to edit the post.
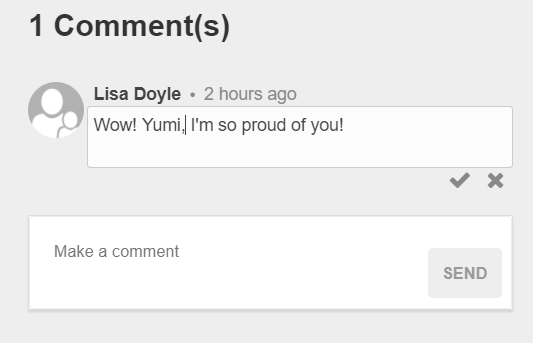
- Enter your changes and click the checkmark to accept them. Or, click the X to cancel your changes.
Delete a Post
To remove a post:
- Click the trashcan icon.

- Click the checkmark to accept them. Or, click the X to cancel.
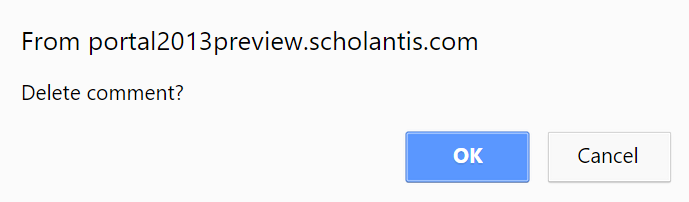
- Click the OK button in the confirmation pop-up to complete the deletion.