Memos
About Memos
Memos are designed to communicate targeted policies, bulletins, and other critical information to relevant audiences across your district. Like an announcement, you can include text content and attachments, but with a specific sender and targeted to specific audiences so staff can only see the memos pertinent to them. You can define your audiences, using Active Directory groups or users (e.g., Secondary Principals), and the source department (e.g., Human Resources).
Memos Demo
A live demo of Memos is available on the Scholantis Preview site, please register for the SharePoint User Group for more information.

Features
- Specify the source of each memo with individual colours and symbols to display which department the memo is from (e.g., from IT, HR, Instruction).
- Quickly target a group of people to send a memo to (e.g., to All Principals) by specifying a recipient.
- Flag a memo as an information to be read, or an action which requires the recipient to perform a task.
- Memos are easy to view, and attachments can be quickly viewed right in the browser.
- Memos have the usual announcements-like features such as display on and expiry dates as well as an archive page for old memos.

Memo notifications are shown to all members of the site, not just the users targeted by an individual memo. A future update will improve this behavior.
The memo archive, by default, will show all memos to all site members. If you wish to only show memos targeted at the current user, you can modify the app settings on the Memos Archive page. Memos permissions allow all users of the site to access all items, they are not secured individually.
View and Open Memos
All staff can view memos specific to them. Memos are accessed through your My Site.
To access your memos:
- From the My Site - Home page, click Memos on the site navigation bar to access the Memos page.
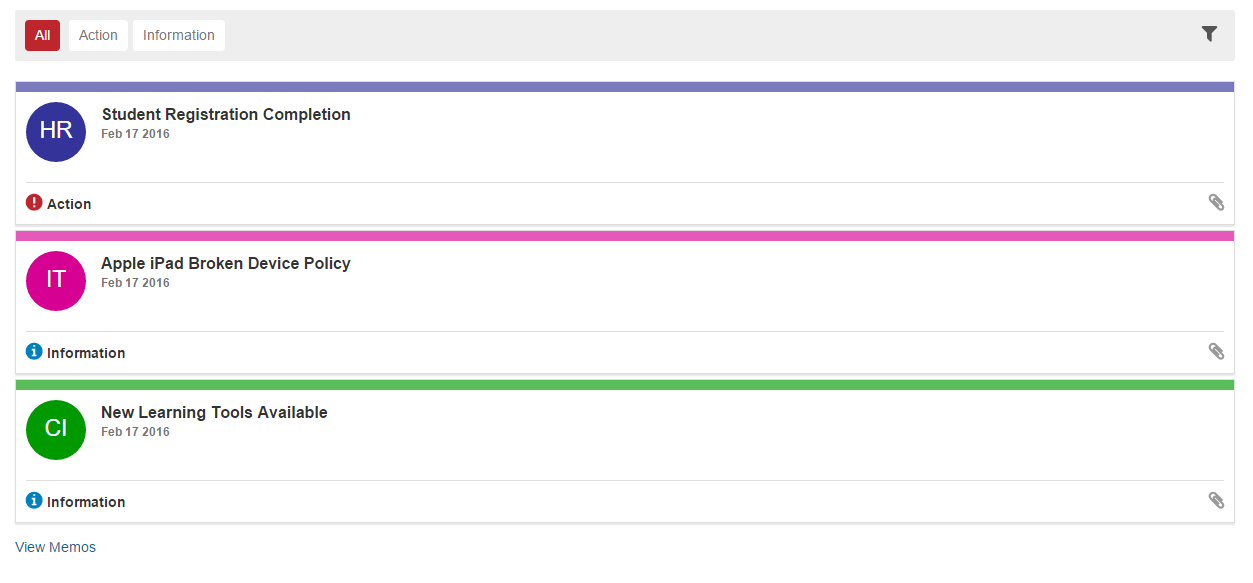
- Memos are colour-coded with icons indicating which department they come from. The type of memo (action, if action is required, or information, if information-only) is also shown. By default, all memo types display.
- To sort your memos by type, click either Action or Information at the top of the list of memos. Click All to return to the default view of all memos.
- If the memo has an attachment, a paperclip icon displays.
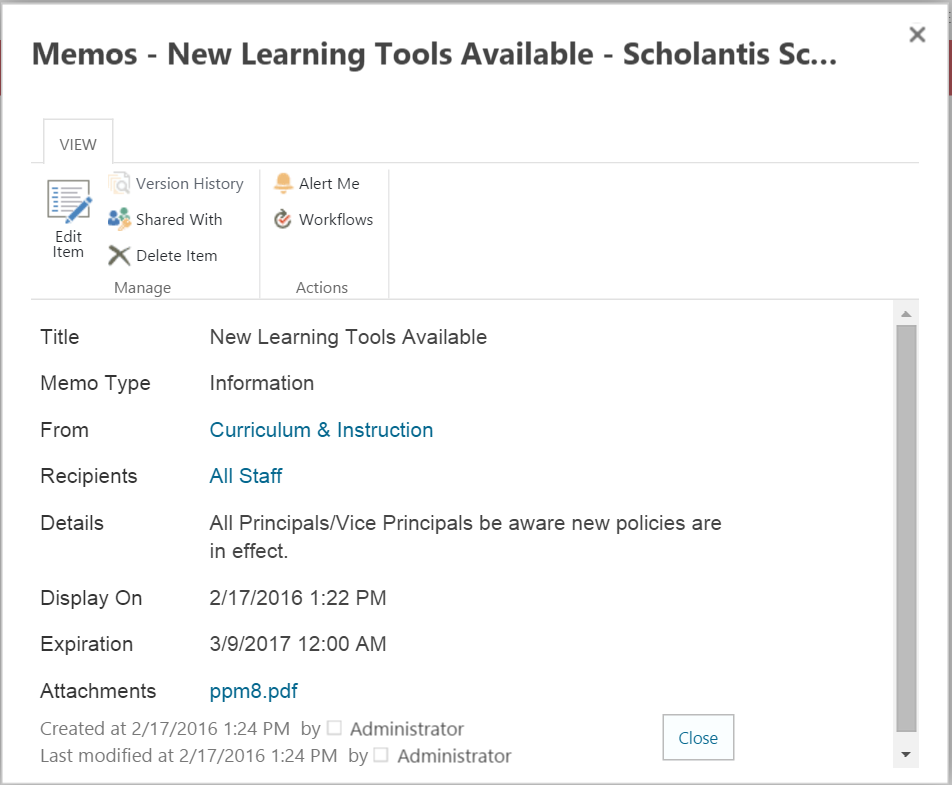
Open a Memo and View Attachment(s)
To open a memo:
- Click on the memo itself to open it.

- From within the open memo you can Print, Set an alert, or receive an RSS feed.
- To view any attachments, you can click the Click to preview link, or click VIEW to open the attachment in a new browser tab.
- To download the attachment, click the download icon
 .
.
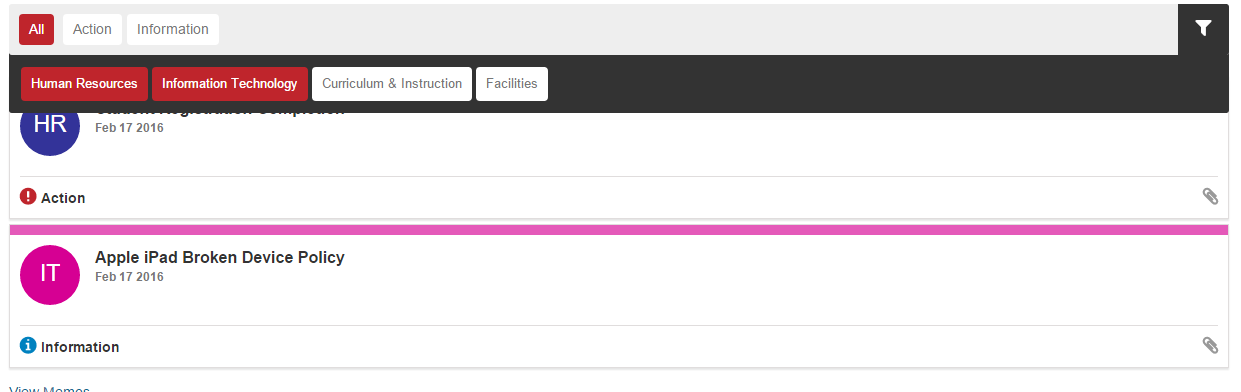
Filter Memos by Source
From within the Memos page, you can also filter messages by which department they are from (Source).
To filter memos by source:
- Click the filter icon on the top right side of the memos list. To access the filter drop-down:

- Click which department to display. When you click a department it highlights according to your theme colours (e.g., Red, as shown below). You can click more than one department or source at a time.
Create a New Memo
Administrators create memos using the New memo easy button at the top of the list of memos. If this button does not display, you may not have access to create a memo.
To create a new memo:
- Click the New Memo easy button to acces the New Item wizard.
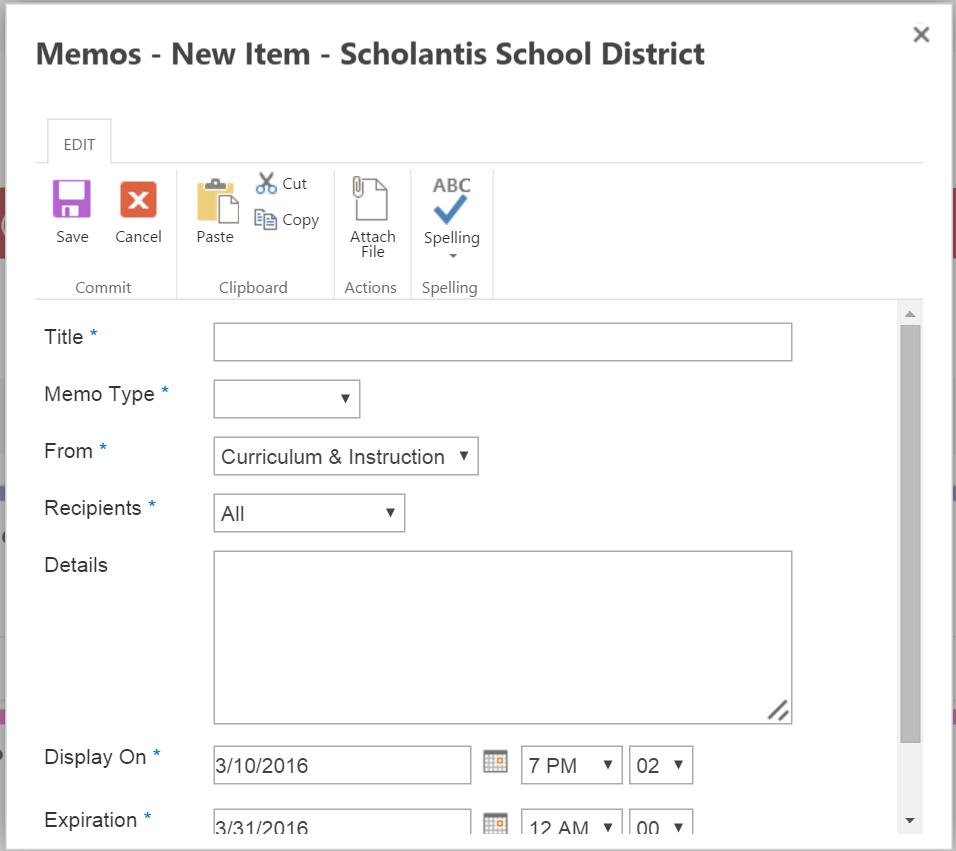
- Enter a title for your memo in the Title field.
- In the Memo Type drop-down, choose whether the memo is for Information only or requires Action from the reader.
- Choose which department the memo is from in the From drop-down field.
- Choose who will receive the memo in the Recipients drop-down field.
- Enter the text for the memo in the Details field.
- In the Display On field, select which date you would like the memo to display.
- In the Expiration field, select which date you would like the memo to stop displaying.
- Click the Save button to save your memo.
Edit Memos
To edit a memo:
- Click the Edit Items button above the list of memos t access the Memos page.
- Click on the memo you wish to edit.
- Click the Edit Item button to access the wizard.
- Edit the fields you wish to edit.
- Click the Save button to save your work.