Event Calendar
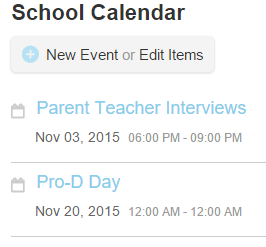
The Calendar appears as a summary list of events on the Home page. There can be calendars for District, School, or Class and Group Events. You can also add a Google calendar to your page, for more information see Google Calendar.
About Calendars
Calendars are added to the site either using the Create Site Wizard or by adding an App to a page (Advanced). Even Classes and Groups can have their own calendars, see Create a Class or Group Site for more information.
- Various Calendars can be “Overlaid” to look at many areas of events at once. You can Overlay SP 2013 calendars for various uses like scheduling meeting rooms, labs, computer rooms etc. These are particularly useful in the Portal. See Overlay a Calendar, below, for more information.
- Calendars can be synced or pushed from the District Portal to the School Website or Portal for events that are for all schools (holidays, PD Days, etc.). See District Sync to Schools for more.
- Calendars can be Synced with Outlook Calendars.
Adding Events to the Calendar
Items will not show on the calendar until they have been added, or synced from the District Portal. This section explains how to add an item to a District, School, or Class/Group site.
Once an event has been added, it will display in the Event Summary, as they become the most current items of interest, and then drop off automatically once they pass. When you create an event, you have the option to make events whole day events, or to select a time range. You can also make an event recurring, and a prompt will appear for daily, weekly, monthly etc. All of the event editing works in a similar fashion to Outlook.
In order to add an event to the Calendar, you need administrative access to the site the calendar is on. For example, teachers can add a calendar event to their Class or Group sites. However, the District or School calendar can only be edited by site administrators.
To add a new event:
- Click the New Event easy button under District Calendar or Event Calendar on the Home page.
The Calendar - New Item wizard displays:

- Edit the fields as follows:
| Field | Description |
|---|---|
| Title | Enter a name for the event in the Title field. |
| Location | Enter where the event will be held, or an address for the event, in the Location field. |
| Start Time | Choose a start date and time in the Start Time field. |
| End Time | Choose an end date and time in the End Time field. |
| Description |
If desired, enter a description for the event in the Description field. |
| Category | Select a Category for this event from the drop-down list. Your choices are:
Meeting You can also select Specify your own value and enter a new value in the field provided. |
| All Day Event | Select this checkbox to make the event an all-day event with no start or end time. |
| Recurrence |
Select this option to make this a repeating event. You will then be given the option to select future dates and number of recurrences. |
| Sync To |
This field only displays if you are on the District site. It allows you to sync your Calendar event to any school in the District. For information on how to sync Calendar items from District to School sites, see, District Sync to Schools, below. |
| Sync To Web | This field only displays on School or District sites. Select this checkbox to sync this Calendar item and publish it to the Public Web site. |
- When you are done, click the Save button.
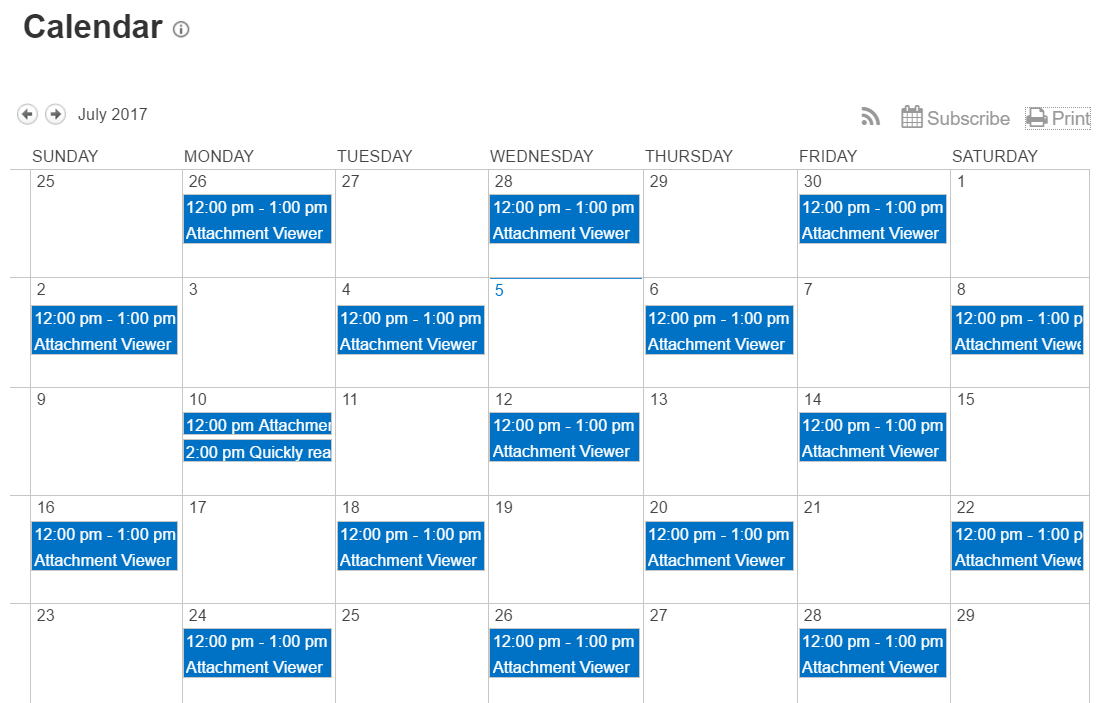
View Calendar or Events
View all Calendar items by clicking the View Calendar easy button under Events. Once you're on the Calendar page, you can view the calendar in a variety of formats: daily, weekly, or monthly. You can also edit events.
To change the calendar display format:
- Click the View Calendar link under Events. The Calendar editing ribbon displays at the top of the page with the following tabs: BROWSE, EVENTS, and CALENDAR.

- Click the CALENDAR tab.
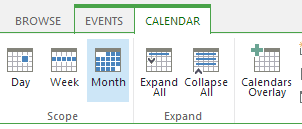
- Click the Day, Week, or Month button to view the calendar in Day, Week, or Month format.
- Click the BROWSE tab for the view to take effect on the Calendar page.
These changes only affect the calendar view from your own account and will not be seen by anyone else.
Delete Events
Only site administrators can delete events from the calendar.
To delete a calendar entry:
- Click the View Calendar easy button to access the Calendar page.
- Open the event to be deleted.
- Under the EVENTS tab, click the Delete button.
District Sync to Schools
Districts with Portals can push certain District calendar events, such as holidays or special events, to the School Portal for events that are for all schools (holidays, PD Days, etc.). It is more efficient for an event to be entered once for all schools than having someone at each school do this work.
You can sync an event either at the time of creating the event (shown below), or you can edit the Calendar item later on.
To sync a Calendar Event:
- From within the District site, access the Calendar Event that you wish to sync to a school site, either by creating a new event (see Adding Events to the Calendar above), or opening the event and clicking the edit item easy button.
- Click on the address book to the far right of the Sync To field.

- Click on the site the Calendar item is to sync to. Then click the Select button.

The name of the school that the Calendar event will sync to displays.
- Click the OK button for your changes to take effect.
Note
You must be on the District Portal and have Administrator access in order to use this feature.
Overlay a Calendar
Calendar Overlay is a useful function for organizing up to ten different calendars different areas into one summary calendar.
To overlay a calendar:
- Navigate to the original Calendar you want to copy onto the summary calendar. Copy the URL.
- Go to the page where you want the overlaid (summary) calendar to display. Note: You must have administrative rights for this calendar.
- Under Event Calendar, click the View Calendar link.
- The Calendar editing ribbon displays at the top of the page. Click the CALENDAR tab.
- Click the Calendars Overlay button to access the Calendar Overlay Settings page.

- Click the New Calendar link.

- Add a name for this calendar in the Calendar Name field.
- Enter a Description for the calendar.
- In the Web URL field, paste the URL from the overlay calendar you have copied previously.
- Select a color for this overlay calendar from the Color drop-down field.

- Click the Resolve button. The screen will refresh.
- Click the OK button.
- Return to the Summary calendar page. The new calendar events display in the selected colour.
- Any updates to overlaid calendars automatically appear in the Summary Calendar.
Manage Overlay Calendars
The Overlay Calendar page allows you to edit, remove, or hide overlaid Calendars.
To hide a Calendar overlay:
If you wish to no longer display a calendar and are not sure you want to delete it, you can simply remove it from view.
- Under Event Calendar, click the View Calendar link.
- The Calendar editing ribbon displays at the top of the page. Click the CALENDAR tab.
- Click the Calendars Overlay button to access the Calendar Overlay Settings page.
- Clear the Visible in View checkbox beside the Calendar you no longer wish to display on your site.
- Click the OK button.
To delete a Calendar overlay:
- Under Event Calendar, click the View Calendar link.
- The Calendar editing ribbon displays at the top of the page. Click the CALENDAR tab.
- Click the Calendars Overlay button to access the Calendar Overlay Settings page.
- Clear the Calendar you wish to delete to access its Settings Calendar Overlay Settings page.
- Click the Delete button on the bottom of the page.
To edit a Calendar:
- Under Event Calendar, click the View Calendar link.
- The Calendar editing ribbon displays at the top of the page. Click the CALENDAR tab.
- Click the Calendars Overlay button to access the Calendar Overlay Settings page.
- Clear the Calendar you wish to edit to access its Settings Calendar Overlay Settings page.
- Make your changes, (such as replacing the URL with a new one and clicking the Resolve button).
- Click the OK button when you are done.
Print a Calendar
You can print a copy of all calendar events in a list format.
To print a calendar:
- Click the calendar to open it in calendar view:
- Click the Print button.
- A list of events displays:

- You can view events in ONE COLUMN (default), or click TWO COLUMNS to view them in two column format (not available on Safari or Apple iOS).
- Click the print icon on the top right side fo the screen to print your calendar list.